


Modelling a coke can
- Nov 6, 2015
- 2 min read
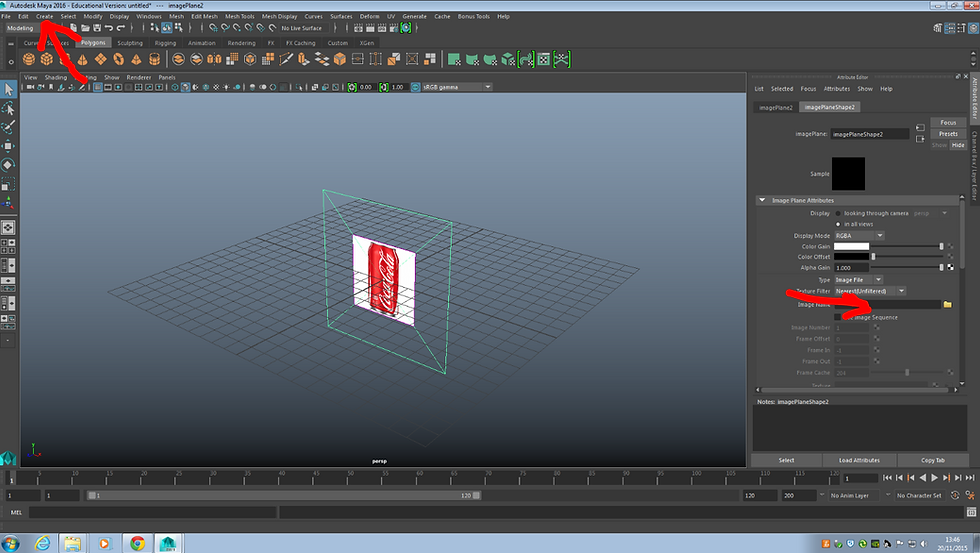
The first thing i did to start modelling the coke can was to import a reference image of a coke can into maya so that i can get the rifght shape when modelling my own can. Under the create menu i clicked "free image plane" which created an image plane in the centre, i then had to input the image onto the plane by clicking the file on the right and selecting the image i wanted.
After importing the image and moving into a good place i pressed "space" and swithed to the front on view and selected the cylinder tool under the polygon tab. I created a cylinder with the same diameter as the reference image of the can and spun it round 90 degrees to make it upright.

The next step was to scale the cylinder to fit the cans height using the scale tool in object mode. Once i had the correct height and selected the faces on top of the cylinder i began to use the extract tool in the edit mesh menu to move and scale the shape of my model to fit the image of the can.

To make the ring on the top of the can i started by using the edge loop tool in the mesh tools menu to add a line around the cylinder, i then switched to face mode and selected all the faces above the edge loop line and extruded them out to create the look of the can. after extruding the ring was very blocky so i kept the same selection but deselected the faces on the top of the cylinder and used the bevel tool to smooth out the can.

To finish of the top of the can i selected the faces of the top of the cylinder and extruded them downwards to make the top of the can and i then began to make a ring pull to place ontop of the can. i used the cylinder tool to start and i then selected half of the cylinder in face mode and extruded it until it looked more like an oval shape similar to a ring pull. i then removed some edges so taht a could extrude the face on the top into the shape on a ring pull and then pushed it down till the was a hole. i also used the bevel tool with the edges selected to round it off. ( this is a can a made earlier which is why there is a material to it)

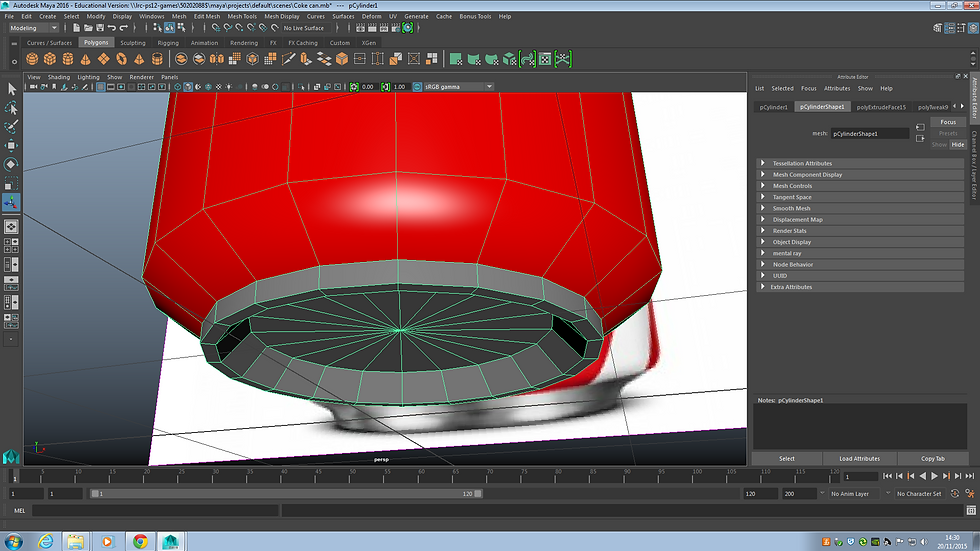
After finishing the top of the can i moved onto the bottom which was much easier, I selected the faces a on the bottom just like i did on the top and used the extrude tool to pull and shape the cylinder to fit the image of the can. the last bit was to simply extrude again with the same faces selected and push the puttom of the can in leaving the can to stand on a ring base.


Comments