


Modelling a Chair
- Nov 26, 2015
- 3 min read
I decided not to use a reference image whilst modelling a chair so that the design of the chair will be somewhat original and so that my skills in maya were tested.
I started with a polygon cube and made it into the rough size of the back of my chair, i then used the edge loop tool in Mesh toools to create a edge around the bottom of the shape. After switching to face mode i selected the face that i had made at the bottom of the shape and used the shortcut (Ctrl + E) for the extrude tool in Edit mesh to pull the face out and up a bit to make the seat of the chair.
I then wanted to adjust the shape of the chair a bit to get it to look a little more comfortable, i did this by swithcing to vertex mode by holding right click and selecting it, I used this mode to select the vertices and move them to better positions and i made sure to select the vertices on both sides of the chair that lined up with eacother by drag selecting them.
My next step was to make the chair less of a flat surface so I used the edge loop tool to put three edges into the chair, One in the middle of the chair and Two inbetween the middle and the ends of the chair. I then switced to vertex mode so that i could select the vertices in the middle of the chair and I moved them down and back to bend the chair inwards.
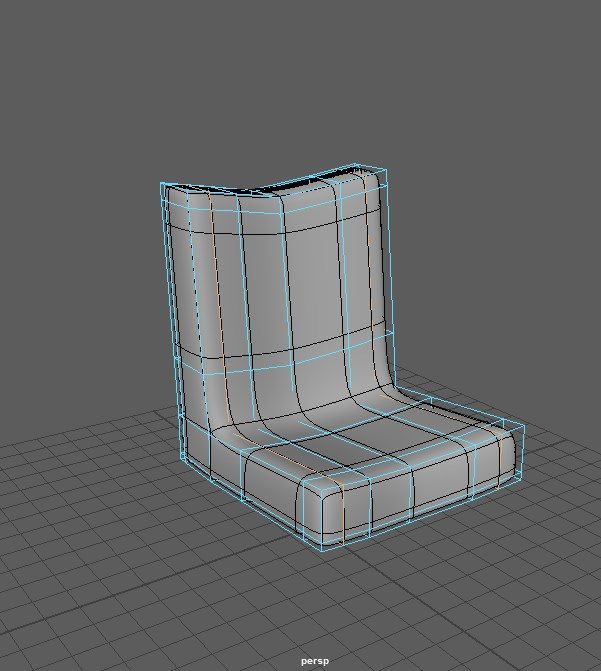
With the basic shape of the seat done the preview smooth tool (2 on the keyboard) to see what it was going to end up like.
The image on the left is after I used to preview smooth tool which i wasn't happy with so i used the edge loop tool to keep the chair closer the the original shape whilst still smoothing it. I put edge loops close to the edges of the chair and i also put edge loops close to the middle edge of the chair.
Once i was happy with the chair I moved onto making the legs for the chair to stand on, i started with two cubes and made them both rectangular and one larger than the other. I used the same technique of smoothing them so i had to insert some edge loops first, once that was done i repositioned the leg of the chair and moved the vertices on the top back to make the leg lean.
With the leg and the leg support done I duplicated the leg (Ctrl + D) and rotated it 180 degrees and moved it the the other side of the support and then selected all three parts and used the combine tool under the polygons tab to combine them and i wasn't happy with where the pivot point was on the object so i used the center pivot tool in Modify to fix that.
The last step was to rotate the legs upright and put them into the right place underneath the chair, I then duplicated the legs and put them on the other side of the chair. The chair looked finished but if i was to render the chair is it is now the smoothing would be removed becuase i have not actually smoothed the objects i have just displayed a preview. To actually smooth the chair i selected all the parts and used the smooth tool under Mesh.
This is the final render of a chair i made before using a very similar technique.


Comments